About course content organization
Your course content is organized using content topics and modules. Use modules to organize the units of your course offering (for example, week 1, week 2, week 3, and so on) and topics to organize the content of each module (for example, lesson 1, lesson 2, lesson 3, and so on.)
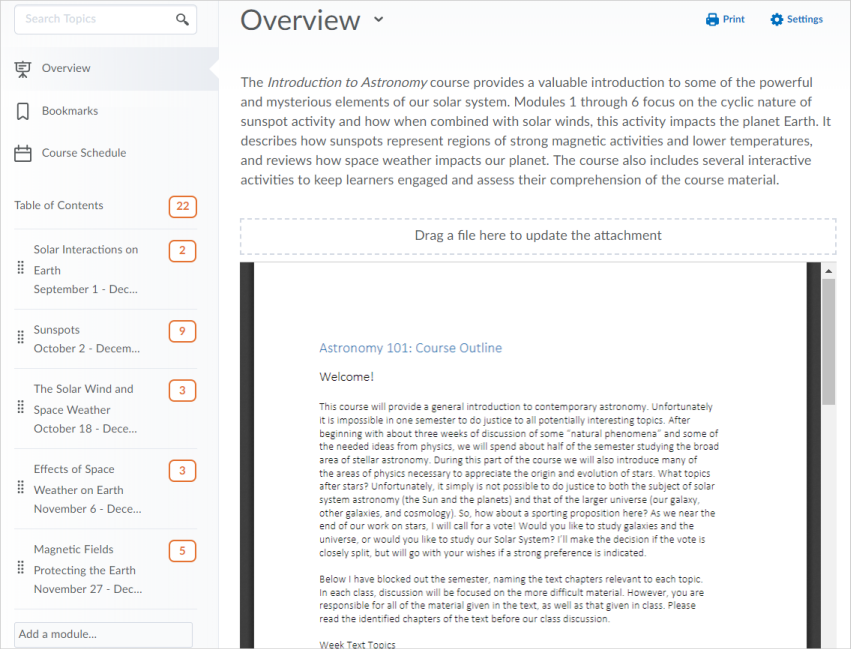
Figure: An Astronomy 101 course in Brightspace Learning Environment
Overview
When users access a course's Content tool for the first time, the first page they land on is the Overview (also known as a course syllabus). Use the Overview page to orient users to the course, content materials, and course expectations. You can insert course overview information using the HTML Editor beneath the Overview title, and you can add a file attachment by dragging a file from your computer onto the upload target, or by clicking Add an attachment from the Overview page.
Note: If you decide not to add anything to the Overview, the Overview link and page is hidden from student view.
Bookmarks
Topics you bookmark appear in a list on the Bookmarks page. Click the Add Bookmark icon while viewing a topic to add it to your bookmarks list. The number beside the Bookmarks link indicates how many bookmarks you have.
Course Schedule
The Course Schedule page lists course material due dates, start dates, end dates, and other course events for the next seven days. If you set availability dates or a due date for a course object, it appears in the Course Schedule page and the Agenda view in the Calendar tool.
The dates listed on this page are not exclusive to Content topics; upcoming events include all events within the course from the Calendar tool. Click Course Schedule to view all past, current, and future course events. The number beside the Upcoming link indicates how many upcoming events you have.
Table of Contents
The Table of Contents panel lists all modules available in your course. Click on a listed module to view and manage its details, topics, and sub-modules. You can also stay on the Table of Contents page to view and manage all modules and topics. Click the Table of Contents link to access the Table of Contents page. This page enables you to view and manage all modules and topics. You can add new topics to existing modules by dragging and dropping files from your computer onto upload targets on the Table of Contents page, and you can also rearrange course materials by dragging and dropping topics between modules.
The number beside each module name in the Table of Contents panel listing indicates the number of topics you have set completion tracking for. The number beside the Table of Contents link indicates the total number of topics you have set completion tracking for. Use the number totals to determine the task load being put on students per module.