Analytics Portal
The Analytics Portal displays reports from the Analytics environment directly inside Learning Environment. This integration provides several advantages over accessing the Analytics Console directly:
- It allows instructors to access Analytics reports for their specific courses.
- It utilizes the security of Learning Environment to access Analytics.
- It incorporates Learning Environment-style navigation and filtering controls that are more familiar to instructors and administrators.
- Administrators can control and customize the portal to determine which reports are available to specific roles and/or specific users.
Granting access to Analytics Portal
Add the Analytics Portal link to a navbar
- Click
 Edit Course on the navbar.
- Click
 Navigation & Themes.
- Click the name of the navbar you want to add the
 Analytics Portal link to.
- Click Add Links in the section of the navbar where you want to add the link.
- Select Analytics Portal from the list of links, then click Add.
Access the Analytics Portal Tool
Click Analytics Portal on the navbar of your course homepage.
Note Contact your system administrator or your Desire2Learn Account Manager if you do not have access to Analytics and believe that you should. Instructors and other roles in your organization can also request reports generated by Analytics using the Analytics Portal tool (available in the 1.2.0 release of Analytics).
Analytics Reporting
The Analytics Portal page displays the list of reports that are available according to a particular role (for example, an administrator or an instructor), and/or specific users within Learning Environment. From this page, you can:
- View the report list.
- Add a New Report.
- Edit portal reports.
- Manage Categories.
- Run portal reports.
- Search For portal reports.
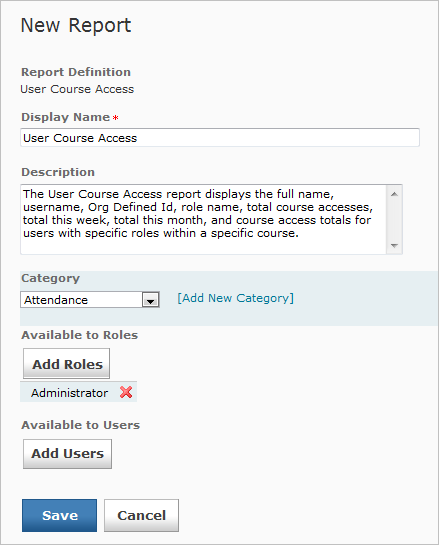
Add a New Report
- Click New Report on the Analytics Portal page.
- On the New Report page, select a Report Definition Category to filter the available reports based on category.
- Select a Report Definition. This filter contains the list of available reports based on the Report Definition Category you apply.
- Click Next.
- Enter a Display Name if you want to overwrite the default.
- Enter a Description if you want to overwrite the default.
- You can select an existing Category, or add a new category by selecting the Add New Category link beside the Category filter. New Categories require a Display Name.
- Select Add Roles to make the report available to specific roles.
- Select Add Users to make the report available to specific users.
- Click Save to finish, or Cancel to exit the report without completing it.
Registering a Report
Note You can remove Roles and Users from accessing the report by clicking the  Remove icon beside their name.
Edit a Portal report
- On the Analytics Portal page, select
 Edit Report from the context menu of the report you want to edit.
- Make your changes.
- Click Save.
Set a default report
- Only reports without filters associated to them can be set as default reports. Currently, no reports without filters exist in the Analytics Portal.
Edit a report category
- On the Analytics Portal page, click Manage Categories.
- On the Manage Categories page, click on a category Display Name or select Edit Category from the category's context menu.
- Make your changes, then click Save.
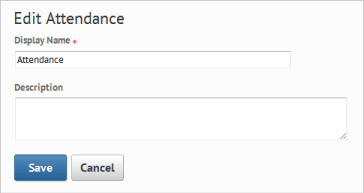
Editing a Report Category
Run a report
- On the Analytics Portal page, click on the desired report's name.
- Use the Report Filters to make your selections.
- Click Run Report.
Note Collapse the Report Filters and Report Description to make additional space on the screen for the report by clicking the  Collapse icon beside the section you want to collapse.
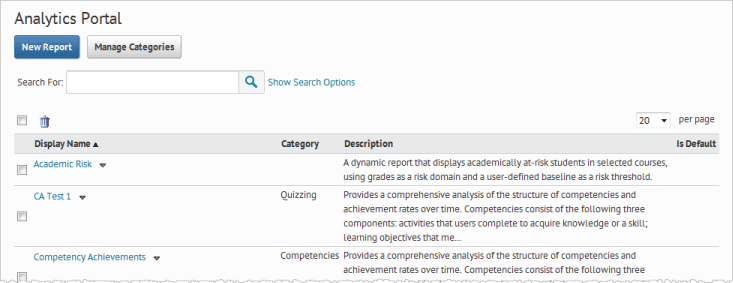
Report List page
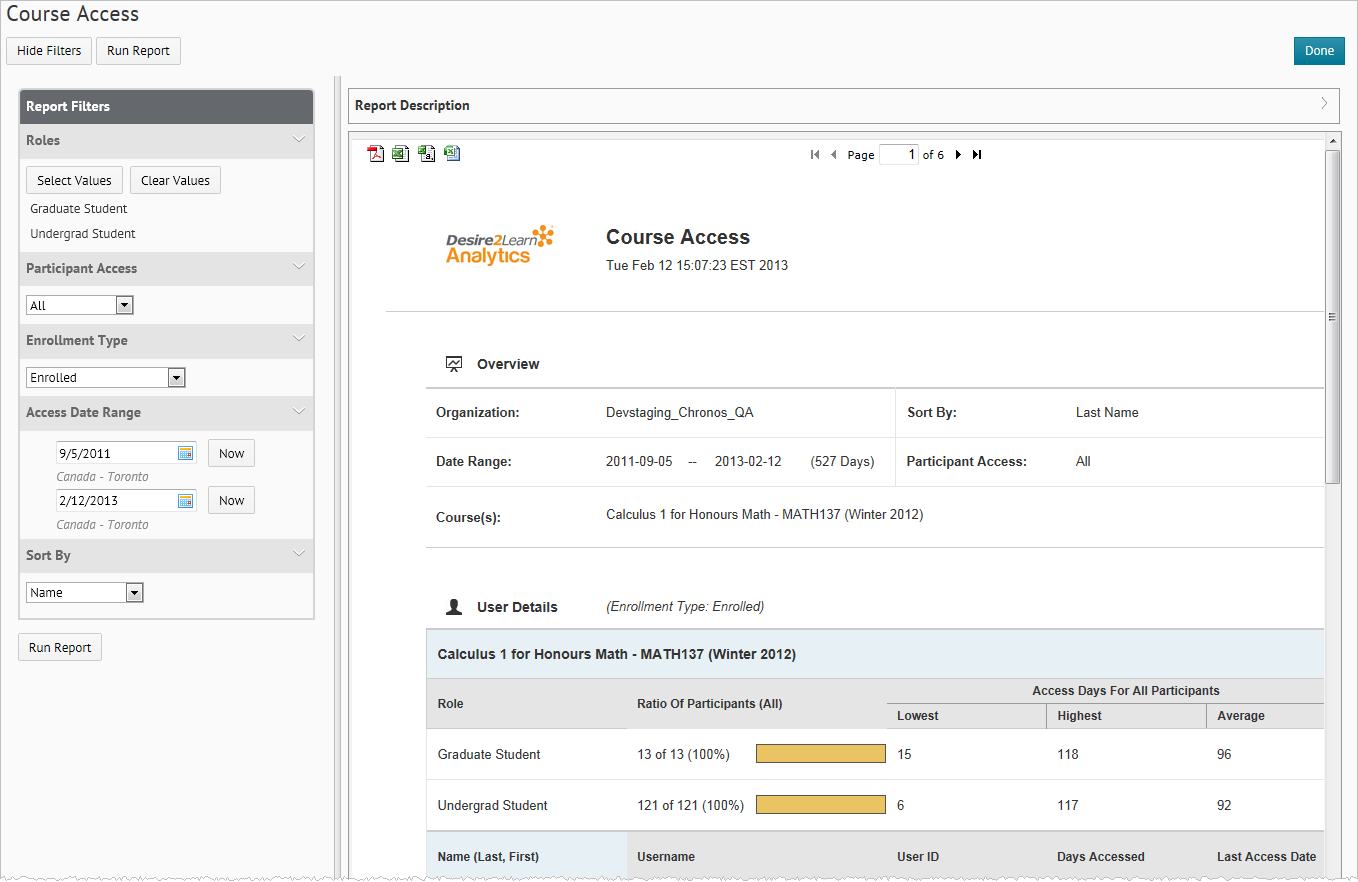
Course Access report
You can export reports in the following formats:
- PDF (includes graphical content and images).
- CSV (text only).
- Excel XLS (text only).
- Excel XLSX (text only).
