The course tree is a drag-and-drop workspace where you can arrange and rearrange your course structure.
The course tree represents course content as a hierarchy of nested nodes. The appearance of each node denotes its type, the object type it holds, and the actions you can perform on it.
The first node in the course tree is the course node. When selected, you can change your course offering information in the selected node panel. You can also return to the Course Builder Welcome Page from the course node's context menu.
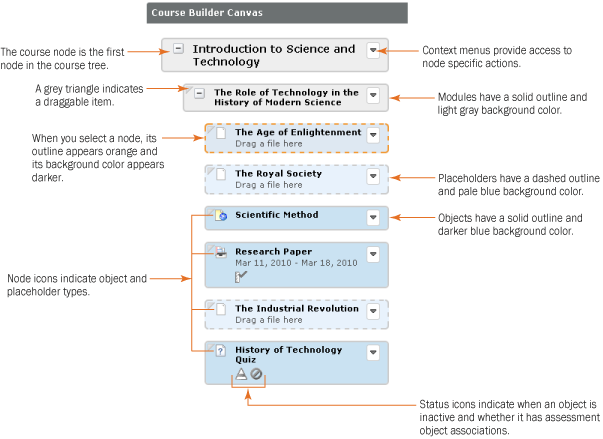
The visual elements on nodes
Drop targets indicate where you can drag a particular module, placeholder, or object. If you drag an item over a node, that node appears orange to indicate whether you can drop it there.
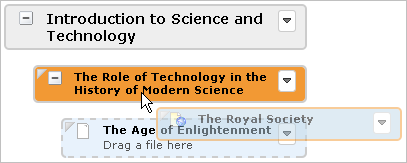
A node turns orange when it is a drop target
If you drag an item above or below a node, a black line appears to indicate whether you can drop that item before or after the node.

A black line indicates a drop target
Dropping an item on a module node or the course node automatically appends that item to the bottom of the parent node's hierarchy. This is helpful when adding many items after one another; instead of dragging each one to the bottom of a sizable hierarchy, you can simply drop items on the parent node.
Use the move commands in a node's context menu as an alternative to dragging and dropping from one section in your course to another.
You can also cut and paste a node as an alternative to dragging and dropping it from one section in your course to another.
Note When you remove a module node, its child modules and placeholders are also removed.
Deleting or moving files, links, discussions, dropbox folders, and quizzes within their tools can result in broken objects. If an object breaks, Course Builder displays a broken link status icon within its node. The object becomes a placeholder retaining its name and notes.

A node with a broken object
To repair a broken object, simply drag an object from the toolbox onto the placeholder.

Dragging a file object onto a broken object placeholder
